
This article is designed to take you through the first steps of creating your Course Lessons in the Console.
This article will take you through the initial steps of creating your Course Lessons and how you can amend some of the settings to best suit you and your Community. If you are looking for a guide on how to create a Course, why not check out this article here.
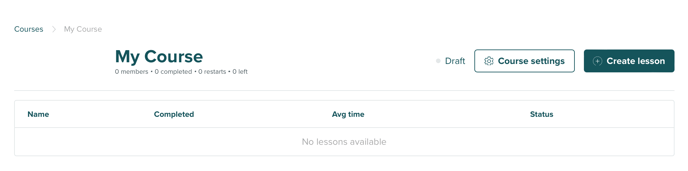
Let's start off by logging in to your Console and navigating to the Content option in the left hand menu. From here, tap Courses to be taken to your Courses landing page. It's here that you will see any and all Courses you have already created, and their live or draft status. Click into your Course of choice to begin.
Creating a Lesson:
Once you are in your Course, the first step is to tap the + Create Lesson button found at the top right of the page and give that Lesson a name.
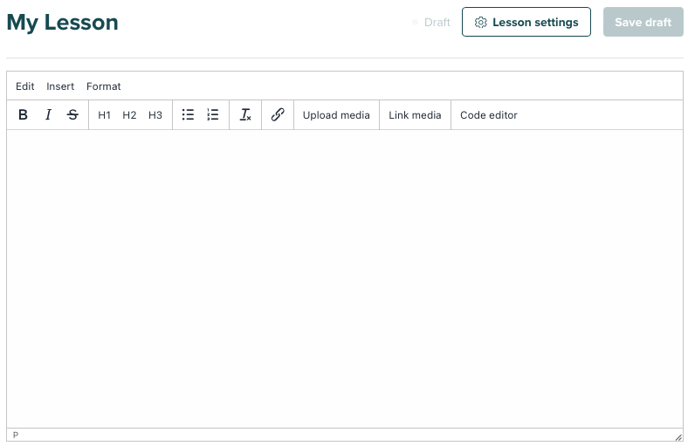
 You will be taken to your Lesson editor. This mighty piece of kit allows you to do a whole host of things to create some brilliant and engaging Lessons for your members.
 This article is designed to give you an overview of what you can do and how to publish your new Lesson, however, if you're looking for some inspiration, we've got you covered over here.
Text Editing:
The most obvious thing you can do here is add text for your Lesson. Most Lessons will have some form of text in them, however, depending on your style, you can write out whole articles and guides.
You can also edit these using the tool dashboard.
Code Editing:
If you are a bit more familiar with some basic HTML and inline CSS coding, you can add this to your Lesson through the Source Code.
 Here you can add in some basic HTML code to further customise your Lesson. However, we'd always suggest testing your code out before you make your Lesson live to all of your members!
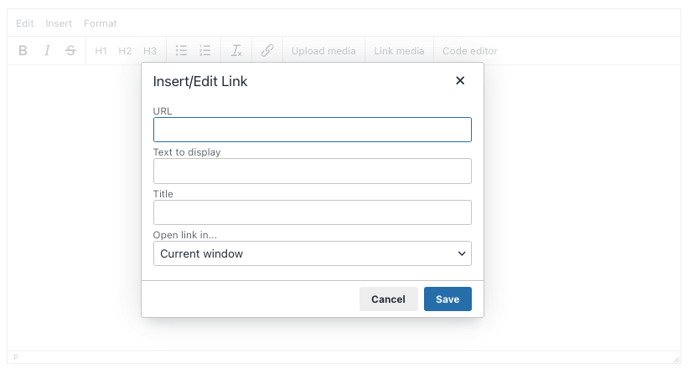
Hyperlinking:
Tapping on the chain link icon, will allow you to add a hyperlink to your lesson. You can either highlight a piece of text that you wish to hyperlink, or you can add in the text from scratch by typing in the text you want in the Text to display field.
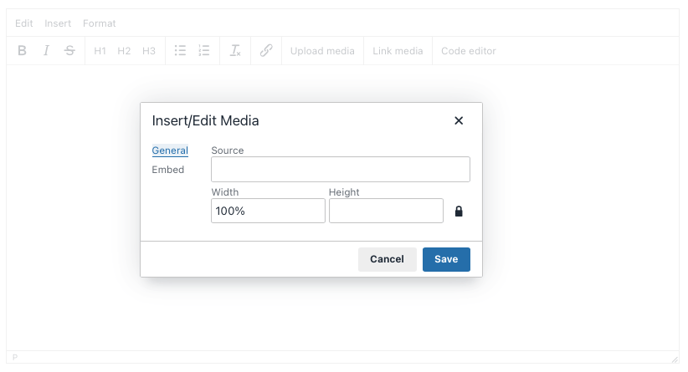
Uploading Media:
As you might imagine, this does what it says. It allows you to upload media you own to the Lesson.
You can then edit the height and width of the content you're uploading through the Code Editor to best suit your needs (this isn't possible for all media, such as the audio track player).
Embedding Links:
Finally, perhaps the most powerful feature available to you, is the ability to embed links from other sources into your Lesson.
Tapping the Upload Media button will show you a pop-out window that allows you to add in your link.
- General: Allows you to add in your source link and set the height and width of your embedded content.
- Embed: Gives you the flexibility to insert your own code and add amendments to it.
- Advanced: Allows you to add in an alternative source URL.
This gives you a lot of flexibility to embed things such as:
- Videos through sites such as YouTube.
- Surveys created through platforms like Google Forms.
- Audio tracks on platforms such as Spotify.
- Slide Shows created in platforms such as Google.
 Once you are done creating your Lesson, always remember to press Save Draft so you don't loose your work!
Lesson Settings:
Finally, once you've built out your Lesson and saved it, you can head to the Lesson Settings to make some final adjustments to how your Lesson is presented.
Tap on Lesson Settings to be taken to the following pop-out window. It's here where you can do the following:
- Add or change your Lesson image.
- Turn your Lesson live, or return it to draft mode.
- Rename your Lesson.
- Delete your Lesson.
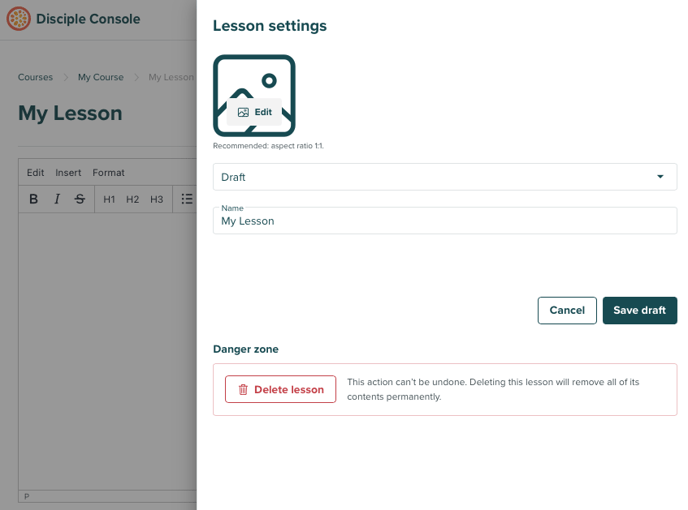 The main thing to customise here is the Lesson image. Tap on the Edit button over the placeholder image, to upload an image that suits your Lesson best.
We recommend a 1:1 image ratio for this.
Next, change your Lesson to live or draft depending on where you are with your creative process. If your Lesson is live, but your Course is still in draft, then nothing will be available to your members.
Your live Lessons will only be available in your Community, when they are a part of a live Course.
Finally, once you're happy with your Lesson, make sure you press Save Draft.