
Whilst not technically designed for conducting Livestreams, Zoom is a popular tool amongst Community Hosts. Read on to learn how to Livestream via RTMP with Zoom.
This article is a follow-up to our article on How to Livestream with RTMP on Web, which should be read before this.
Step 1:
The first thing to be aware of is that to be able to utilise Zoom to Livestream via RTMP, you must first have a Zoom Pro, Business, Education or Enterprise account.
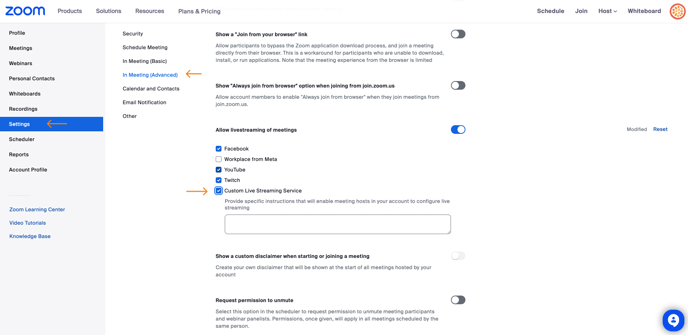
Head to your Zoom account by logging in on their website and navigate to the Settings tab. From here, you're going to select In Meeting (Advanced) and scroll down until you find the Allow live-streaming of meetings section and toggle this on.
You are going to see a few different options checked, but the one you will need to check is Custom Live Streaming Service.
Step 2:
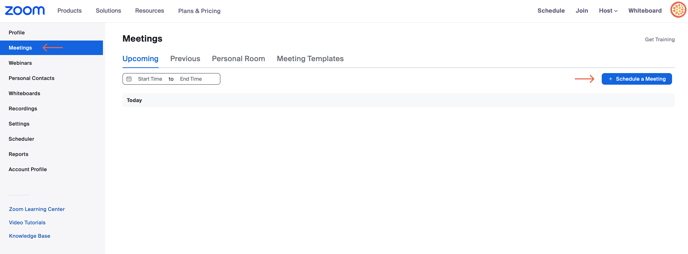
Once you've enabled the custom live streaming service, you will want to head to the Meetings tab. Here, you were going to click on + Schedule a Meeting to schedule our intended Livestream.
Add in any relevant details and make sure you are scheduling the Livestream meeting for the correct time and date that you intend to be live.
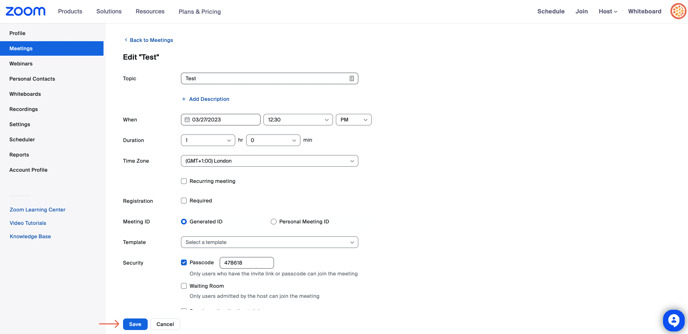
Don't forget to press Save at the bottom!
Step 3:
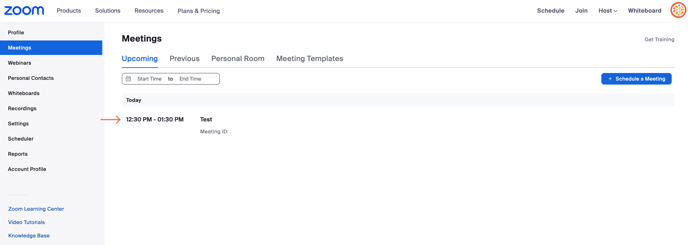
Staying in the Meetings tab, click on your now scheduled meeting.
Then select in the Live Streaming section, click on Configure Custom Streaming Service.

Here you are going to have a few details to enter.
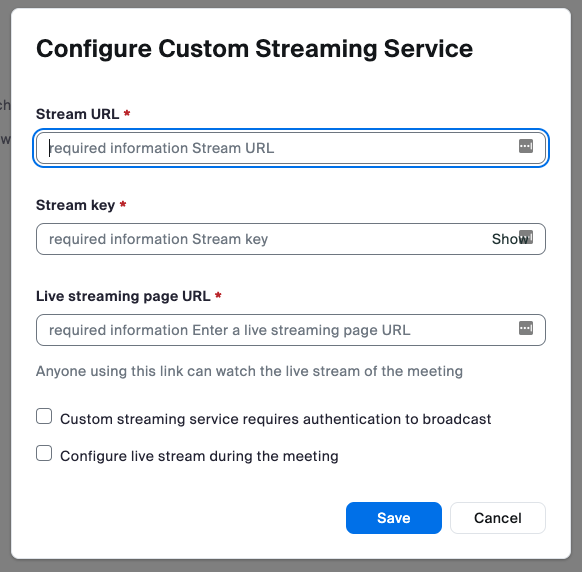
Both the Stream URL and the Stream Key can be obtained by following steps 3 and 4 in our article on How to Livestream with RTMP on Web.
The Live streaming page URL is simply your Disciple Community URL with /live at the end of it.
Then press Save when you're done!
Step 4:
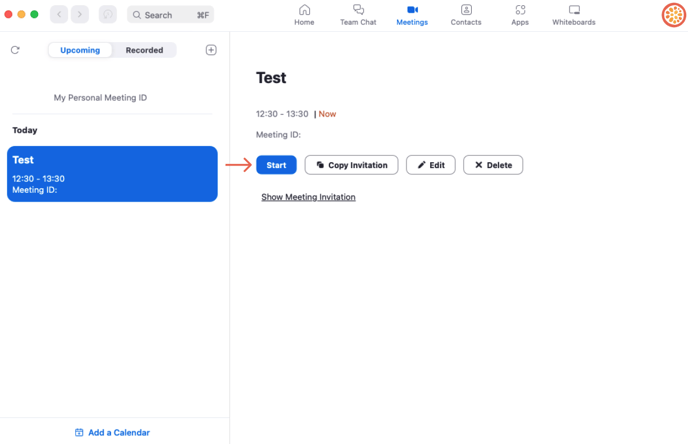
Once it's nearly time for your Livestream to begin, head to your Zoom App, select your scheduled meeting and press Start.
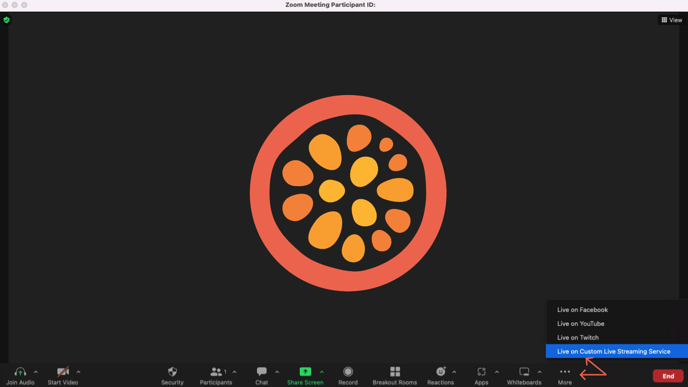
With your meeting now started on Zoom, you will want to navigate to the bottom right of your display to click on the More button, and then select Live on Custom Live Streaming Service. This will start the Livestream on Zoom (don't worry, you're not live yet to your members, but you are being recorded from this point onwards)!
Step 5:
Once the Livestream on Zoom has started, head back to your already open Web Community Livestream page and you will see that the system has recognised that you have started your stream in Zoom.
Here you'll be presented with the option to Notify Your Members. Pressing this will send a notification to your members and put the Livestream into Standby Mode. At this point, your Community will be made aware that a Livestream is about to start but they will not see the stream itself.
Step 6:
Finally, when you're ready to start the Livestream with your members, select the Go Live button. By selecting the Go live button, the stream will be sent from the RTMP software to your Community.
Your own Web platform Livestream (the one you are logged in to) will only show a static image and the Comments may not load here. Don't worry, as this is to be expected.
Instead, open a private window and log in with a second account, or open your iOS or Android app and log in there, to see the Livestream and your members Comments.
How do I Stop Live-Streaming Through RTMP?
Once the Livestream has come to an end, it will need to be stopped in the Community and on Zoom through two simple steps.
First, click the End Livestream button in your Community - this will end the stream to the Community but will not stop the stream in Zoom.
Next, you will need to go back to your Zoom App and End the stream from there. This will completely stop the stream.
Once the stream has ended, you will be given the option to Post the stream to a select Group, where it can be accompanied by a Post, (but don't forget, this recording will include everything from the moment you started the stream on the Zoom app. You may want to instead download a copy of the Livestream and edit it before making your Post).