
As a Community host, managing your members is a crucial task. The Members section of the Console is a powerful tool that offers you a lot of options, let's take a look at some of what you can do.
Let's start off by logging in to the Console, which will automatically open on the Members section.
However, if you want to navigate to the Members section from within the Console, you would select Engage from the left hand side menu and then click on Members.
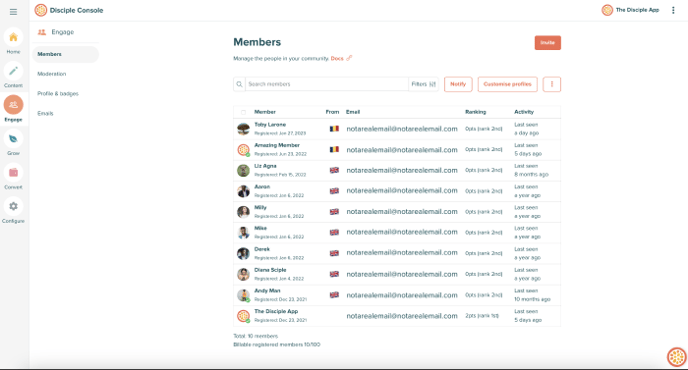
This page will initially show you a list of all of your members, sorted by the most recently joined at the top.
Here you will be able to see your members:
- Username
- Most recent location
- Ranking
- Last active time
 Clicking on a single member will take you to their user profile, prviding you with more in-depth details such as their subscription status and their profile field answers.
Here you can also individually
- Manage a members permissions
- Reset their password
- Utilise some of our moderation tools if necessary.
The Search Bar:

Here you can search for a specific member, or even a specific term such as the name of a Group.
Applying Filters:
Selecting this, allows you to apply set filters that can help you easily navigate through your member list. The filters are pre-created for you, and the system will also create new filters for you based on the different profile field questions you have.
You can even use more than one filter, for some extra refined searching!
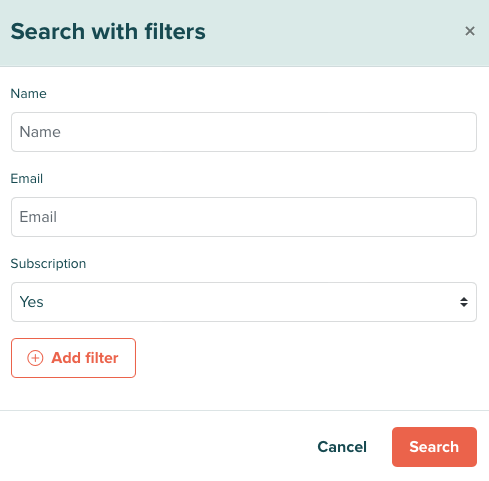
Here you can see we have selected the subscription filter, and applied the answer yes to it. This means that when we press search, our member list will only show those members that have an active paid subscription within our Community.
Notifying Members:
Selecting this, allows you to send a custom push notification to specific members – or all of them, if you wish!
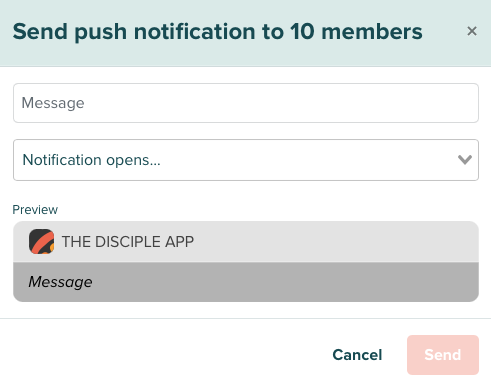
You can learn more about this here.
Customise Profiles:
This is a nice and easy way for you to be taken to your Profile fields and Badges pages.
The Three Dots:
Clicking the 3 dots will open up a menu that gives you the option to sort your members by a desired metric, and also gives you multiple actions.
It's important to note, that anything you click here will impact all members in your member list unless you have added a filter or selected multiple individuals.
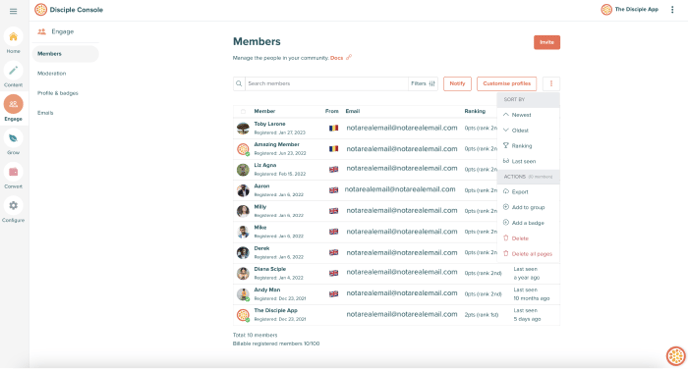
Sorting:
Here you have the option of sorting your member list by the following metrics:
- Newest member
- Oldest member
- Their engagement ranking
- The last time they were seen
Actions:
- Export: Begins the process of creating a CSV file containing data about your members. The more members you have the longer this process can take.
- Add to Group: This is great for adding members to a Group(s) of your choice in bulk. However, be mindful that you cannot bulk remove members from a Group!
- Add Subscription: This allows you to grant a free subscription to a member(s) of your choice.
- Add a Badge: This allows you to grant a specific badge to a member(s) of your choice. You can do this in bulk, however, be mindful that you cannot bulk remove badges from members!
- Delete: Here you can select single or multiple members and delete them from your Community. Please note that deleting members Is Not Reversible.
- Delete all pages: This allows you to delete all members based on a certain filter you have applied. Please note that deleting members Is Not Reversible.
Deleting Members:
When you delete a member, you are given two options:.
- Delete all content: This gives you the option of keeping the members content or choosing to get rid of it when the member is deleted.
- Keep in mind, when it's gone it's gone. So it's worth doing some checks before deleting members that have been around for a little while or are top contributors.
- Send deletion email: This option, allows to send a deletion email to the member if you want to inform them of their account deletion.
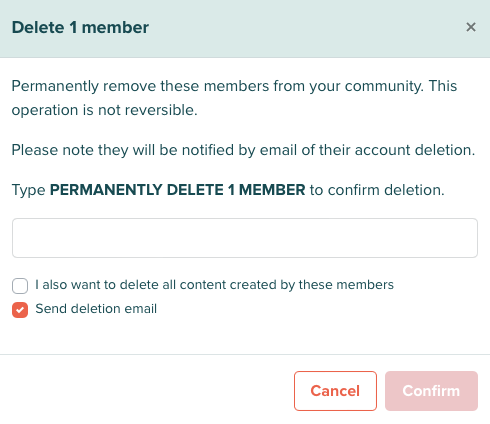
To finalise the account deletion, you must type out the phrase highlighted in bold in the exact same way it is written. So in the example in the image above, we would type PERMANENTLY DELETE 1 MEMBER into the text box.
Think of this as a failsafe feature, so that you don't accidentally delete a member.
Invite:
Takes you via a direct link to the invite section of the Console. A section designed to help you grow your Community, and empower your members to refer their friends and families.
You can learn more about this feature here.
Top Tips:
- The bottom of the Members page will show you the total number of members in your Community.
- The Collective (our Community for hosts only) is a great place to learn from your peers about what has worked well for them with managing their members.