
Did you know you can add an Add to Calendar button to your Events by utilising third party platforms.
There are multiple third party platforms that are geared specifically towards Events, they offer a range of added functions that you can incorporate into your in-platform Events.
One of these options that you an incorporate into your Community Events, is an Add to Calendar button.
We know that the platforms AddEvent and Eventbrite allow you to add in an Add to Calendar feature, however, we are sure that there are multiple other third parties that can allow you to do this.
Create the Event in the Third Party Platform:
You have created your Event in the Console and now you want to head over to your third party platform of choice and create the Event there as well.
We would recommend using the same language and images as your Disciple Event, to make sure everything is nice and consistent for your member.
Some third party platforms also allow you to create a ticketing system and an RSVP list, so it is worth exploring their features to see what else you can incorporate.
Once you have finished creating your Event again, head back to the Console.
Adding the Button in your Disciple Event:
Now that you are back in the Disciple Console, let's start by editing your Event. Head to the bottom of the page, and you will see an option to add a button.
Tapping this allows you to add a button to your Event, as outlined in our Events article.
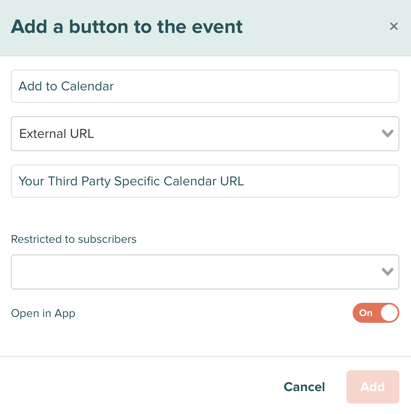
When you are filling in the options for your Event button, make sure to select External URL from the drop-down menu and then paste in your specific calendar link from your third party platform.
Finally, you can also utilise the Open in App feature, so the third party platform page opens directly within your Community.
Don't forget to press Publish once you're done!