
As a community Host, managing your Members is one of the crucial tasks. Here's your guide to how to manage your members individually in the Console.
How to manage individual Members
To begin with, head to the Console, click on Engage and and select Members from the left hand side menu.
Next, search for their name or email address in the search field and simply click on them. You'll then see their extended profile.
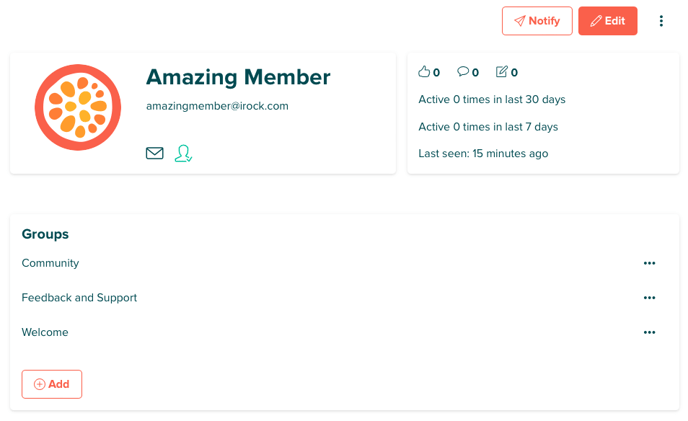
In the module with their name and profile, you'll see that Member's permissions. In the module to the right you can also see more of their engagement stats.
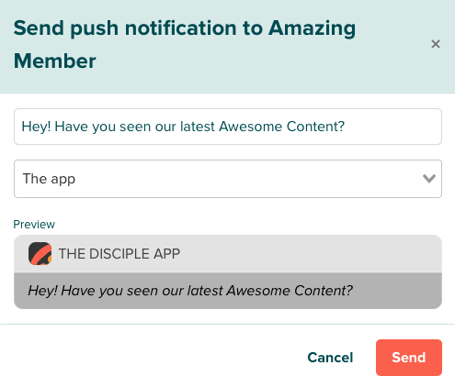
By clicking 'Notify' you can send this specific Member a push notification. You can tailor the notification's content to that Member and choose what to open when the Member reacts to the notification.
| Here's what your Member will see when they get your push notification. | 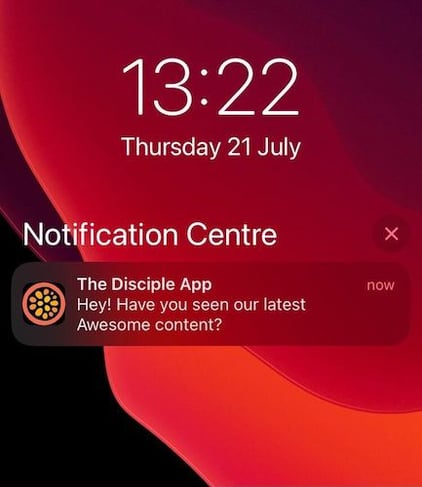
|
From a Member's page you can also edit their permissions and some of their info. Just click Edit. From here you can edit the Member's profile picture, username and email address. You can also give them:
- Ability to send push notifications to all users - When the Member posts the community will receive a push notification.
- Ability to receive connection requests and be followed - Will be searchable if someone wants to add them as a friend.
- Ability to be a trusted reporter - If they report a post it will be removed immediately.
- Ability to livestream – They can Livestream to your community.
- Ability to be a verified member - They'll have the sought-after green tick ✅
- Ability to be a moderator - They will have the ability to disable an account or reset a password (you can find out more here)
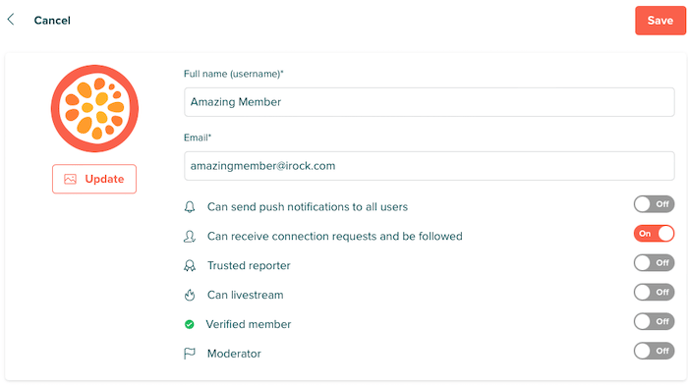
Click save and you're done!
Want to learn more about the Members section and it's actions? Click here
Looking to create your own community app? Contact our Community Experts - info@disciplemedia.com
Need help with your existing Disciple powered community? Contact our Customer Support team - help@disciplemedia.com