
If you intend on monetising your Community, then you'll have to connect Google's API to Disciple. But don't fret, we're here to guide you through it!
Whenever a member purchases a subscription or makes an in-App purchase in your Android App, we need to receive certain information from Google's API to make sure the member correctly get's access!
We'll come clean with you, this is a multi-step process, however, once it's done you won't need to do it again and we have you covered for every step you need to take!
Step 1: Log in to your Google Play Console
Let's begin by logging in to your Google Play Console. Keep it as an open tab in your Web Browser for now, as we will be returning to this page later (we recommend you do not use private/incognito mode here).
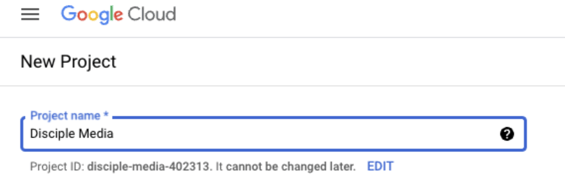
Step 2: Create a Google Cloud Project
Now follow this link to be taken to Google's Cloud Project Console. This link is going to take you directly to the section that allows you to start creating your new Google Cloud Project.
Step 3: Enable the Google Play Developer API
Next up, follow this link here and click Enable. (That's the last link we'll give you to follow, we promise!)
Step 4: Create a Service Account
In your Google Cloud Console, select the newly created Disciple Media project and then tap on Create Service Account from the menu at the top of the page.

- Under Service Account Name: type Disciple Media.
- Under Service Account Description: type Disciple Media.
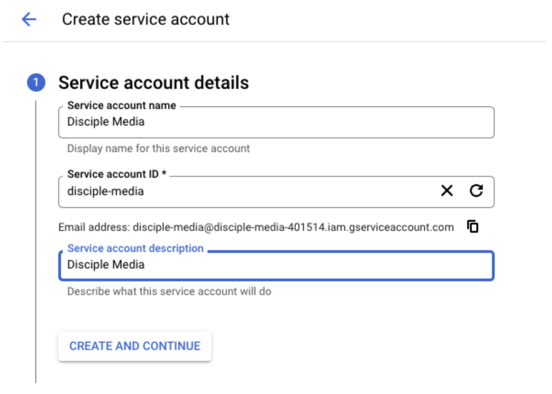
Once you have done that, press Create and Continue.
Next you will be able to add permissions to the newly created account. The first thing you will want to do is tap on the Select a role drop down menu and choose the following two options:
- Project
- Editor
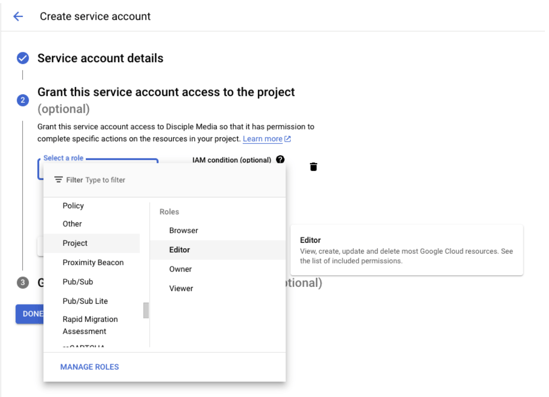
After giving the newly created account, its role permissions, you'll be provided with a specific account email. Copy this new email and paste it into a blank email – you'll be sending this along with some other information to your Customer Success Manager.
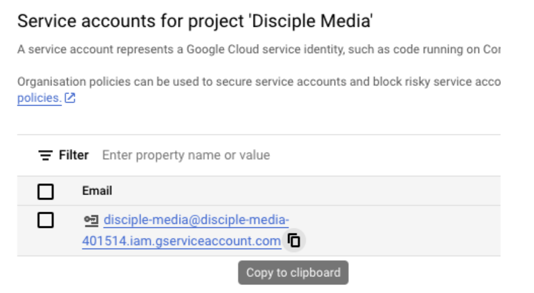
Click into the email itself now, and navigate to the Keys tab from the menu.
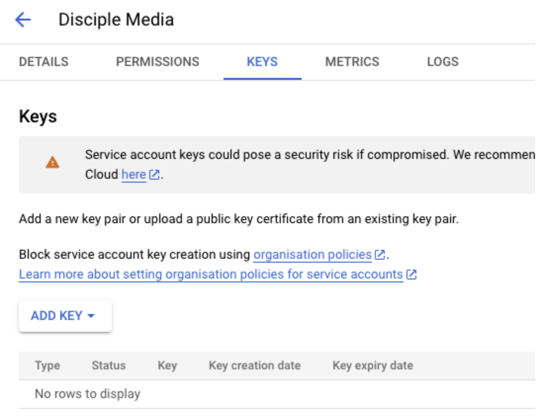
Tap on the Add Key option, then select Create New Key, P12 and then finally tap Create.
Two pieces of information will now be provided to you, that you will need to also add to the blank email for your Customer Success Manager:
- A P12 certificate is created and will be automatically downloaded on to your device. (Please attach this to the email to your Customer Success Manager).
- A pop-out box will appear on screen, showing you the newly created private key password. You will need to copy this password and also add it to the email to your Customer Success Manager.
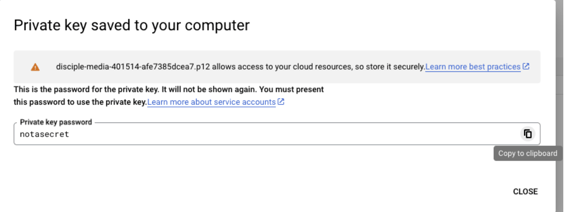
You can now close the pop-out box.
Finally, you will be shown a newly created API Key, please also copy this and add it to the email to your Customer Success Manager.

The email to your Customer Success Manager should now contain the following four things:
- The Email address for the API user.
- The Private Key Password.
- The P12 Certificate.
- The API Key.
You can now send this email!
Step 5: Adding the new API Email Address as a User
Head back to your open Google Play Console navigate to the Users and permissions tab which can be found on the left hand menu.
Here you will find the option to Invite New User, click on this and paste in the email address for the API user from Step 4.
Under the Account Permissions tab, make sure to select Admin (all permissions).
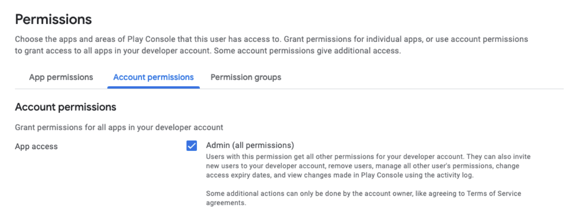
Finally (yes we really mean finally this time), click on Invite User and then Send Invitation.
This is now complete and your Customer Success Manager will use that information to set up the Google API for your Community, ready for your successful launch!