
Running a community can feel like a full-time job so why not lighten the load by giving extra permissions to specific members to help you out.
If you're wondering how you can achieve this, we'll cover everything you need to know.
How to change permissions:
Step 1
Find the member(s) you want to give extra permissions to. To do this, simply click on 'Members' in the Engage section, found on the left-hand menu of the Console. From there you can either search for them by using the search bar or you can manually scroll through your member list until you find the member(s) you're looking for.
Step 2
Once you've found them, click to view their account page and then select 'edit'. Once you're on the edit page you can then use the toggles to choose which permissions your members are able to use by selecting 'on' or 'off'. Once you've made your prefered adjustments click on the 'save' button at the top-right of the screen to ensure you save your changes.
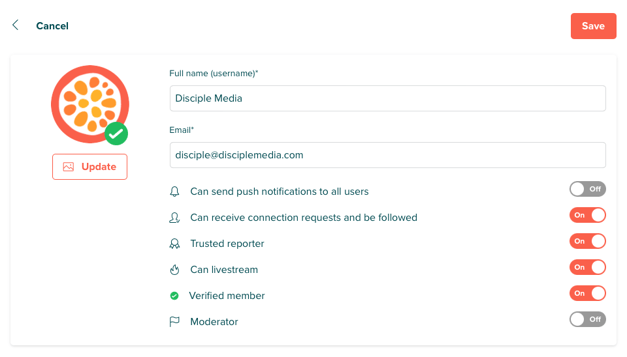
If you're wondering what each permission type means, here's a quick breakdown of each option:
- Can send push notifications to all users – This allows a member to send Push Notifications to other members. Again, you don't want too many members to be able to do this, as multiple notifications a day may be considered spam by some of your community.
- Can receive connection requests and be followed – This means the member is able to be 'searchable' by others and is open to building new friendships with other community members.
- Trusted reporter – A Trusted Reporter is able to un-publish any post or comment simply by clicking on 'Report'. This one is very handy, especially for those times you're moderating on the go. It almost goes without saying, but make sure that anyone you give this permission to is someone you really trust to moderate your community.
- Can livestream – This allows a member to host Livestreams. As a general rule, it's probably best to limit the number of people you give this permission to. This will help you to avoid having several people in your community attempting to live stream at the same time.
- Verified member – This gives the member a lovely green tick so your community knows the content coming from the account is trustworthy.
- Moderator – If a member is given the moderator permission, they can amend another member’s profile from within the community by going to the desired member’s profile page. This includes shadow banning an account. (They won't have Console access though).
How do I make my member a group admin?
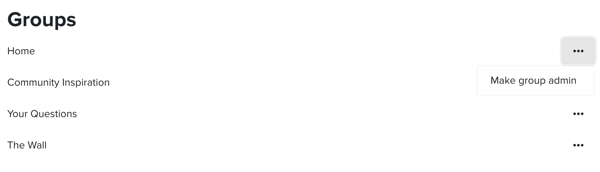
To make a member the admin of a group, go to their account page and scroll down to the Groups section, and you'll be able to view all of the groups that member is in.
If you want a member to be an admin of a specific group, simply click the three dots to the right of the chosen group and select the 'make group admin' option.
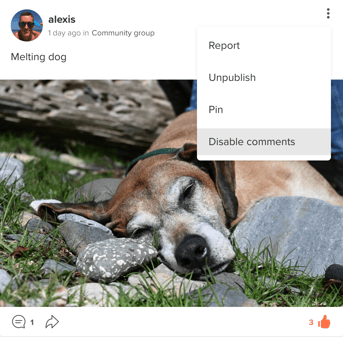
As a group admin your members will be given access to features that are normally reserved for the Console and the hosts, such as scheduling a post, disabling and enabling comments, pinning and unpinning a post, and unpublishing a post if needed. These features are designed to allow a group admin to assist with the management and moderation of your community.
Group admins will only have these features available to them for the specific group they are an admin for. They can access them via the drop down menu on a post in the Community.
Looking to create your own community app? Contact our Community Experts - info@disciplemedia.com
Need help with your existing Disciple powered community? Contact our Customer Support team - help@disciplemedia.com