
Welcome Slides are an immersive way to guide your members through some welcoming messages of your choice. Why not use them to show off parts of your Community, highlight some guidelines or even something else!
The Setup:
Let's start off by heading to the Console, clicking on Grow from the left hand menu and then selecting Onboarding.
To enable the feature, you need to have at least one slide set up.
The Slides:
Click on 'Add Slide' and an editing window will appear on the right hand side of the window.
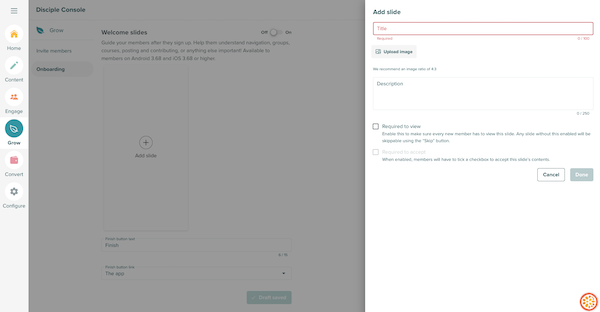
Title: Each of your slides must have a title added to it.
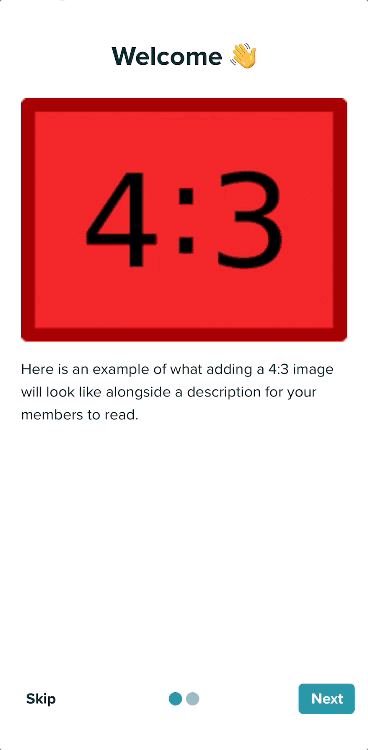
Upload Image: This is optional, however, we advise you do add an image for a more immersive experience.
We recommend a 4:3 image ratio, however other sizes can also work.
Description: An opportunity to add some text to your Welcome Slide which will appear beneath the image you add. This is not optional.
Required to View: This makes this slide mandatory to view, and members cannot skip over it.
Required to Accept: Adding this creates a check box, which a member has to click on to signify they accept the content on the slide. Great for a slide on Community guidelines for example.
This is only available if the 'Required to View' option is enabled.
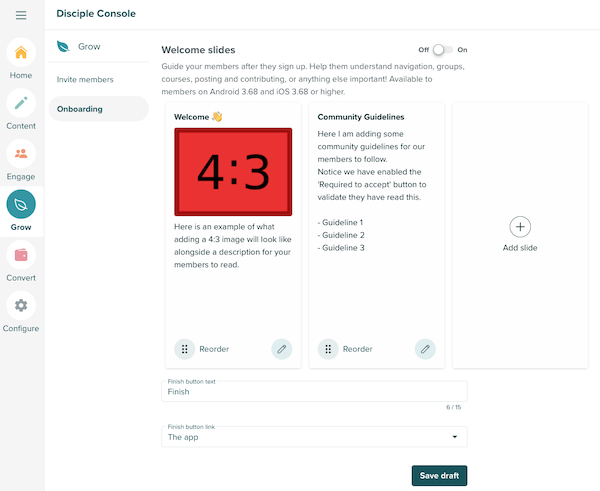
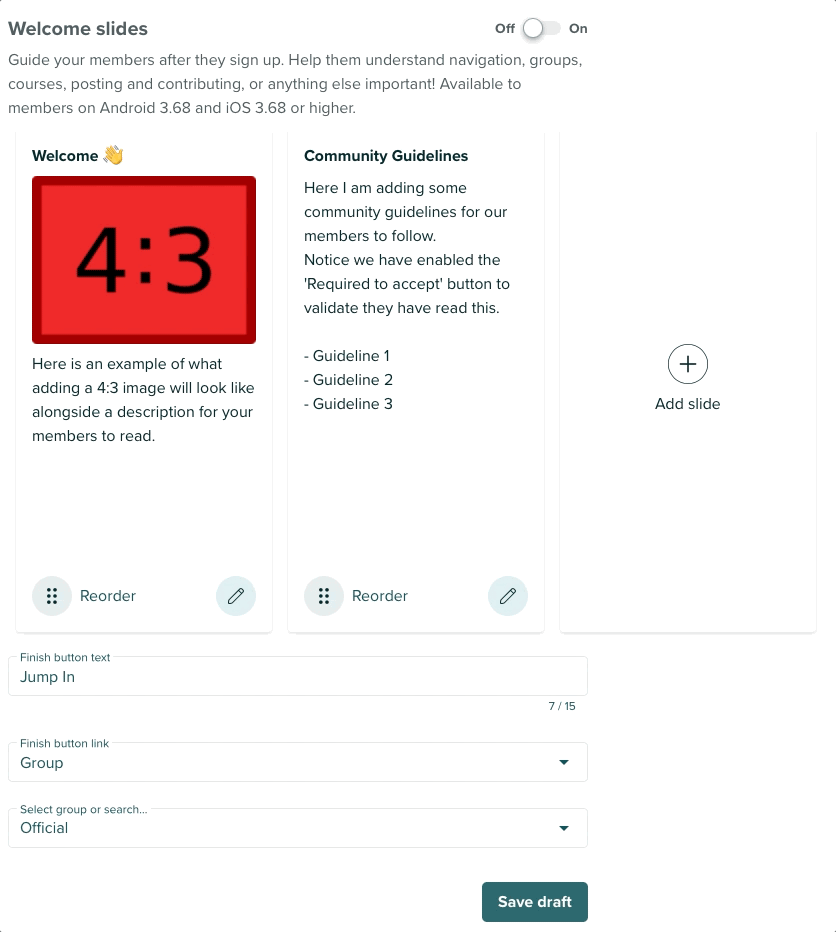
Once you have completed your slide creation, click on 'Done'. Repeat the process to add a maximum of eight slides.
The Finish Button:
Next up, you will want to format the exit button that is presented to members at the end of your Welcome Slides.
Here you can select what it says, and what it does!
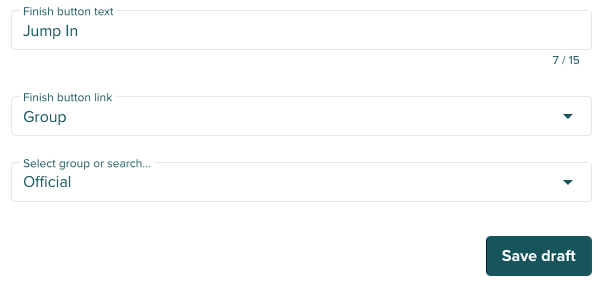
Finish Button Text: This is what you want the button to say, we've opted for 'Jump In'.
Finish Button Link: This is where you select where the Finish Button takes your members once they press it.
You have quite a few options here, but we've opted for it to take members to a specific Group. This then gave us the ability to specifically select which Group we want them to be taken to.
Once you have set up all your slides and your button, press 'Save Draft' at the bottom.
Saving the draft, will enable the option to turn the Welcome Slide 'on' or 'off'.
Once you have toggled the feature on, you will see the 'Save Draft' button has morphed into a 'Publish' button.
Press 'Publish' and let's take a look at our Welcome Slides in action!
Top Tips:
- If the Welcome Slides are required, then the next time a member accesses your Community, they will be presented with them.
- Want members to access the Welcome Slides anytime? Why not link them to a Post button, a Folder, an Event button or the Navigation.
- Want to reorder your slides? Click and hold on the 6 dotted icon to the left of 'Reorder' and drag the slide to your desired place.
- As we mentioned earlier, we recommend an image ratio of 4:3, but other sizes are accepted. However, if an image is too long, it may force members to scroll down as the Description sits below the image.
- The higher the image resolution, the more time it could take to load. We recommend an image size of 100kb or less.