
Posting creates conversation in your Community, allows you to share important messages and brings everyone together.
There's a lot to cover here, so grab some snacks and a refreshing drink, because by the end of this you're going to be a Posting Wizz!
As a host you have 3 different ways to post:
2. Via the App
Let's go through each of them together!
Making a Post from the Console:
Start off by heading to the Console, selecting Engage and then clicking on Posts.
Click 'Create Post' on the right hand side. Next, select the Group you wish to post from and then choose the member account you want the post to come from.
(The user must be a Group Admin to be able to be chosen as the author of the post. Find out more about Group Admins here).
A post can consist of:
- Just text
- Text and up to 5 images
- Text and up to 1 video
- Text and up to 1 file
- Text and up to 1 GIF
Buttons, Polls and GIFs:

- GIF – search for a GIF or paste a URL from Giphy to add a GIF to your post.
- Button – allows you to add a link to an external URL or to another location within your community.
- Poll – allows you to add a poll with up to four options.
Scheduling the Post:
 You want your post to go out at a specific time, but you won't be around to actually post it. Why not schedule it to go out at a date and time of your choice?
Clicking on Schedule lets you first select the date, and then the time you want your post to go out.
Notifications Members:
 This allows you to set what (if any) notifications you would like the post to trigger, even if they go against the notification rules you have set for that specific Group.
Advanced Settings:

- Show as a Sponsored post – adds a Sponsored banner to the post, so your Members know that it's sponsored.
- Pin at the top of the group feed – lets you choose how long you'd like this post to be pinned to the top of this Group for. (It's an easy mistake, but this will not pin it to the top of the Activity Feed, just the top of the individual Group)
- Restricted to Subscribers - this will only show if you have Subscriptions enabled for your community. This setting will restrict any non-text content so that it's only viewable to paid subscribers.
Once you're done, don't forget to press CREATE POST!
Making a Post through your Mobile App:
Making a post through the Mobile App doesn't give you the same creative control as posting through the Console does. However, sometimes you can't get to your computer and you need to keep the conversation going, so here's what you can do:
Open your Community App and head to the Activity Feed. From here, you can click on the + button in the bottom right corner of your screen to start creating a post. Select the Group you want to post to and away you go!
Here you can:
- Add an image, file or a video (up to 5 images, 1 file or 1 video per Post).
- Add a GIF.
- Take an image or video directly from your camera.
- Start a Livestream (only available to members with the correct permissions).
- Schedule your post to be published at a specific time (only available to Group Admins).
Also, depending on if you are a Group Admin with the correct permissions and how you have configured your Groups, you will also see a cog icon appear in the bottom right corner of the screen. This will give you the options to:
- Subscriber only - restricts any non-text content so that it's only viewable to paid subscribers.
- Disable sharing - means that other members cannot share your post elsewhere.
Finally, press Post at the top right of the screen and there you go!
Making a Post through your Web Platform:
Making a post through your Web platform follows much of the same process as doing so through your Mobile App.
Head to the Activity Feed and select the group you want to post to from the top of the page.
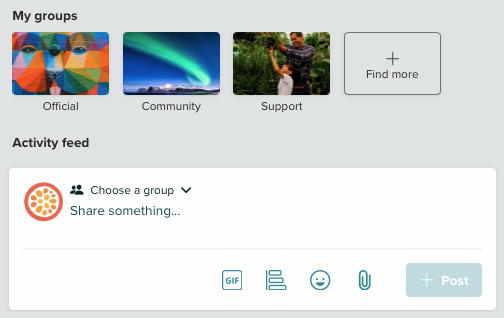
This will automatically take you to the Groups page and gives you a box to start typing into.
In much the same way as with the Mobile App, you do not get the same level of creative freedom with your posts as you would when making it through the Console, but there's still a lot you can do!
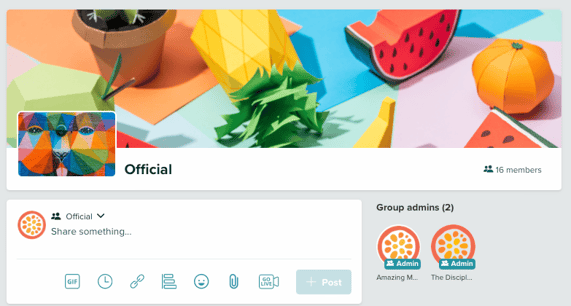
From left to right, you can:
- Upload a GIF to your post.
- Schedule your post for later publication. (Only available as a Group Admin)
- Create a Link Button that allows you to add a link to an external URL or to another location within your community.
- Create a Poll. (Only available as a Group Admin)
- Add a fun emoji.
- Upload an image, file or video to your post. (Up to 5 images, 1 file or 1 video)
- Livestream via RTMP. (Learn more about this feature here)
And finally, once you've created your content, don't forget to press Post!
That's it, you're now a certified expert in Posting!
Disciple Tips:
- Under a post in the Console, you can actually see its level of engagement.
- Use hashtags in your posts to grow member engagement!
- Pinning posts with a description of the group, or group rules is a great way for members to immediately gain insight and understanding of the group.