
MailChimp can help you reach your user-base in a different way. It gives you complete control over communicating with your members via email.
How it Works:
It may sound obvious, but for this integration, you will need to create your own Mailchimp account. We also recommend creating a new user list specifically for your Disciple App.
For each user who registers in your Community, we create a new entry in your specified Mailchimp list and include the below information about the user.
- Email address
- Date registered - date user signed up with email address
We also keep these fields up to date in your list for all users, so if a user updates their email in your Community, this will also get reflected in MailChimp.
You can then use these fields to segment your communications to your users. You can learn more about segmentation within MailChimp here.
Step One - MailChimp:
To set up the Mailchimp integration, you will need 2 things from Mailchimp. You will need to capture the API Key and the Audience ID.
Generating the API Key:
To find the API Key, click on your profile icon at the bottom left of your MailChimp dashboard and select Profile from the pop-out menu.
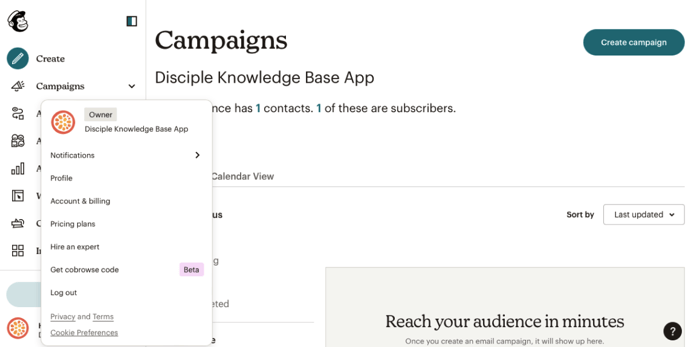
Select Extras from the menu and then choose API Keys.
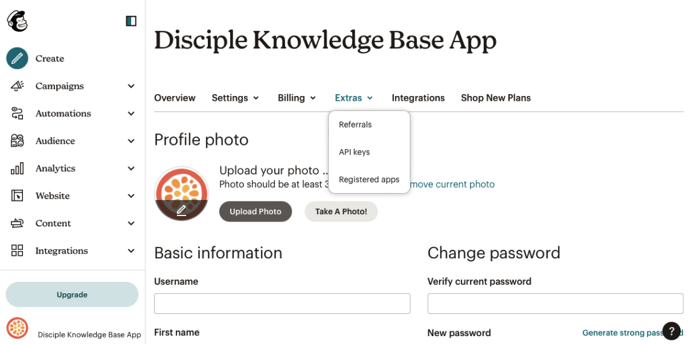
Scrolling down slightly will present you with the option to Create a Key.
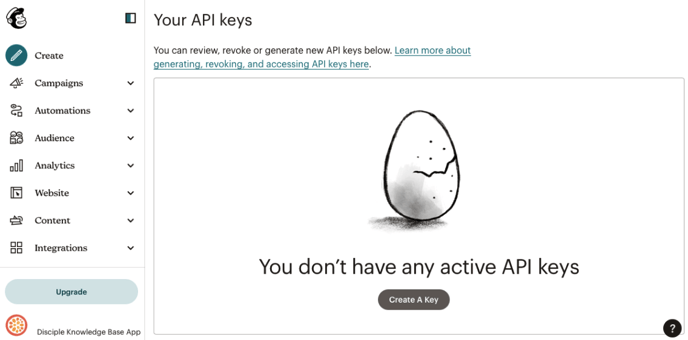
Clicking this, will require you to name your new key, and then it will generate a new API Key for you.
Once the new key is generated, Mailchimp will ask you to note it down somewhere secure as you will not be able to see it again. So now's a good time to open your trusty password manager and make a copy of this new key.
Generating the Audience Key:
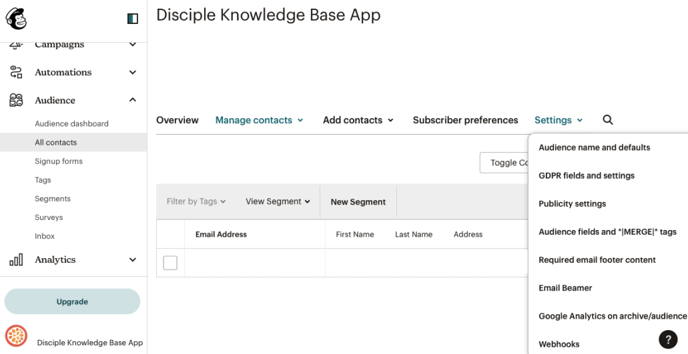
To find your Audience Key, start off by clicking on Audience from the left hand menu and select All Contacts.
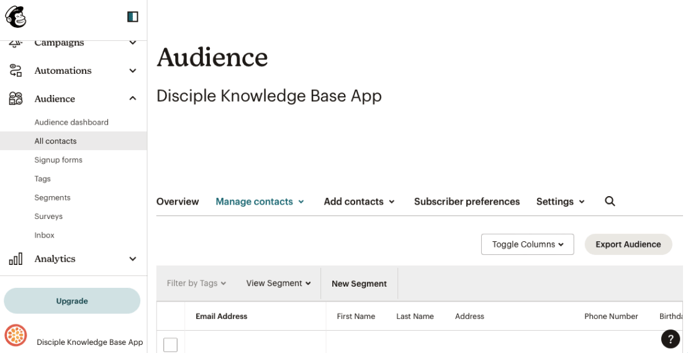
Choose Settings from the menu and then click on Audience Name and Defaults from the drop down menu.
You'll find the Audience Key to the left of the new page. don't worry about saving it externally, as you can always come back to this page to check it. For now, make a quick note of it so that you can use it in the following steps.
Step Two: The Console:
You're almost there, all you need to do now is add your API and Audience Keys into the Integrations page in the Console.
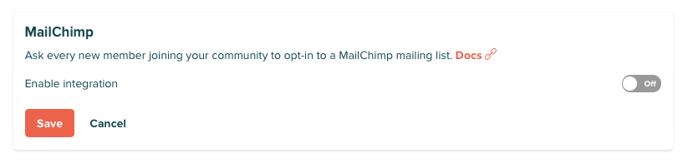
Once you're in the Console, select Configure from the left hand menu and then choose Integrations. You will see the MailChimp integration and an option to Enable the integration by selecting the toggle.
Enabling the integration will present you with a new window in which you can add in all of the details we've just gathered in the previous steps.
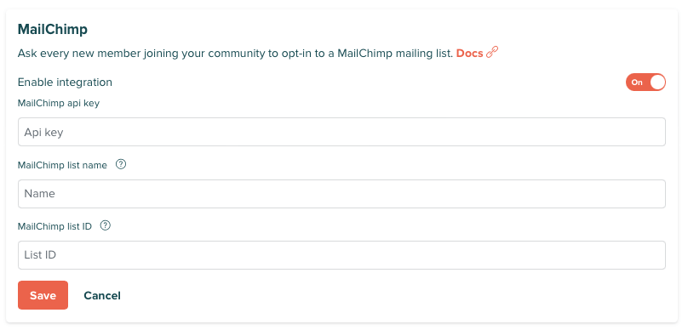
Once you've typed them in, press Save and that's your integration enabled!
By selecting Save you are confirming your Mailchimp integration and pushing it live to your Community. However, for it to display on your Mobile App, you will need to perform an App update.
If at any moment you decide that you do not wish to have your Mailchimp integration any longer, then you can simply disable this integration using the same on/off toggle. Once toggled your Mailchimp integration will go into a disabled state where it can be enabled again at any time.